Playing the game
Now that you've got the patched ROM file, it's time to get ready to start playing!
Select the platform you want to play on:
Play on PSP
Requirements:
- Sony PSP console
- Custom firmware setup on your system. If you followed the guide to dumping your ROM earlier, you've probably already done this!
- Memory Stick with at least 2 GB of free space
- Mini USB Cable
- A Windows, macOS, or Linux computer
Setup:
- Connect your PSP to a PC via USB and enter USB mode.
- Navigate to the "ISO" folder on the root of your Memory Stick (or Internal Storage on a PSP Go) and copy the patched .iso you previously created to this folder. Exit USB mode when finished.
- If you have a non-permanent CFW, launch it now.
- Navigate to the patched Soul Eater: Battle Resonance file under Game > Memory Stick (or Game > Internal Storage on a PSP Go) and launch it. The game will launch and play just as if it were being played off a UMD. Enjoy!
Play on PS Vita
Playing on the PS Vita requires you to have Custom Firmware installed on your console, as well as the homebrew app Adrenaline, which is used for playing PSP games.
Requirements:
- Sony PS Vita console
- PS Vita Memory Card with at least 8GB capacity
- Windows, macOS, or Linux computer
- Micro USB cable - OR - an internet connection on your PS Vita
First-Time Setup:
- Follow the steps on vita.hacks to install custom firmware onto your PS Vita.
- Next, follow these steps to install Adrenaline.
Transferring the patched .iso file to your PS Vita
Transferring files via Cable:
- Open VitaShell. (If the WiFi on your Vita is turned off, it will ask if you want to enable it - this is only necessary of you plan to use the wireless file transfer feature, otherwise it doesn't matter if off or on).
- Once VitaShell loads, press START to bring up the main settings.
- If you are using an SD2Vita, make sure the USB device option in the menu is set to SD2Vita. If not, select your primary storage device (e.g. the Memory Card, if you only have an official Vita Memory Card for storage).
- Change the "SELECT button" option to "USB".
- Press START again to close the menu.
- Press SELECT. You will now see a prompt on screen to connect your Vita to a computer via USB. Leave that prompt open, and do so.
- Once connected, you should now be able to browse your Vita's files on your computer.
- Navigate to the ux0:/pspemu/ISO/ folder and copy the patched .iso you previously created to this folder.
- Be sure to Safely Remove Device from your computer before unplugging the USB cable, then press CIRCLE to leave the USB mode.
Transferring files via WiFi FTP:
- Turn on WiFi on your PS Vita, and make sure that Airplane Mode is turned off. Your Vita and computer should both be connected to the same WiFi network.
- Open VitaShell, then press START to bring up the main settings.
- Change the "SELECT button" option to "FTP", then press START to exit out of the main settings. Now, press SELECT. You should see a message with an FTP address, like this:
ftp://192.168.86.XX:1337
The "XX" in the address above will be unique to the IP address your Vita is currently using. - On your preferred FTP client (such as WinSCP or CyberDuck), start a new FTP connection. For the address, type in 192.168.86.XX (with "XX" being whatever is displayed on your Vita), and change the port to "1337".
- Press the connect button on your client. Use "guest" as the username and leave the password field blank. You should now be connected and have access to all of your file system on the device.
- Navigate to the ux0:/pspemu/ISO/ folder and copy the patched .iso you previously created to this folder. It may take some time to complete. Ensure that your Vita doesn't go to sleep during this process.
- Once the transfer is complete, press CIRCLE to close the FTP connection.
Playing the game on Adrenaline:
- Open Adrenaline.
- Navigate to the patched Soul Eater: Battle Resonance file under Game > Memory Stick.
- Launch the game and enjoy!
Play on Emulators
The recommended emulator for PSP games is PPSSPP, which is available on both PC and Mobile. PPSSPP can also be installed as a core for RetroArch, however at the time of writing, the standalone version offers a more stable performance and so is what we recommend.
Select the type of emulator you wish to use:
Emulate on Windows, macOS, or Linux
Requirements:
- Windows, macOS or Linux computer
Setup:
Simply download PPSSPP from the project website for your platform (Windows, macOS, Linux) and save it somewhere easily accessible to your computer.
Playing the game:
Once PPSSPP is installed, press "Browse" under the Games Menu and navigate to the folder where you saved the patched .iso. Any games you have in that folder will now appear in PPSPP's library. Click on Soul Eater: Battle Resonance, and enjoy!
Emulate on Android
Requirements:
- Android Device with the Google Play store
- Windows, macOS, or Linux computer
- PPSSPP
Playing the game:
- Download PPSSPP off the Google Play Store.
- Connect your Android device (phone, tablet, etc) to your PC using a USB cable.
- On your device, pull down the top bar and click the circled arrow:
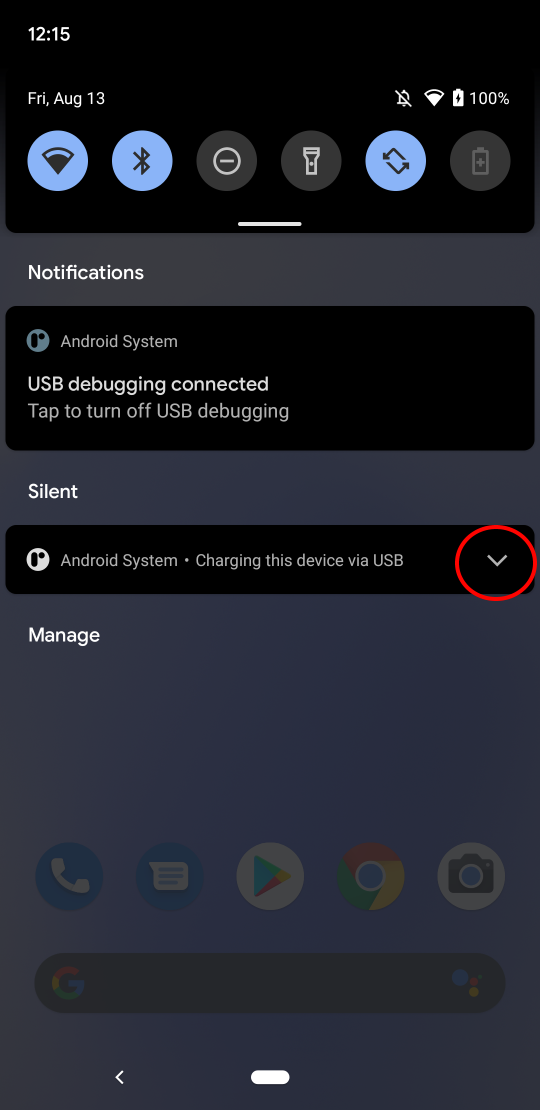
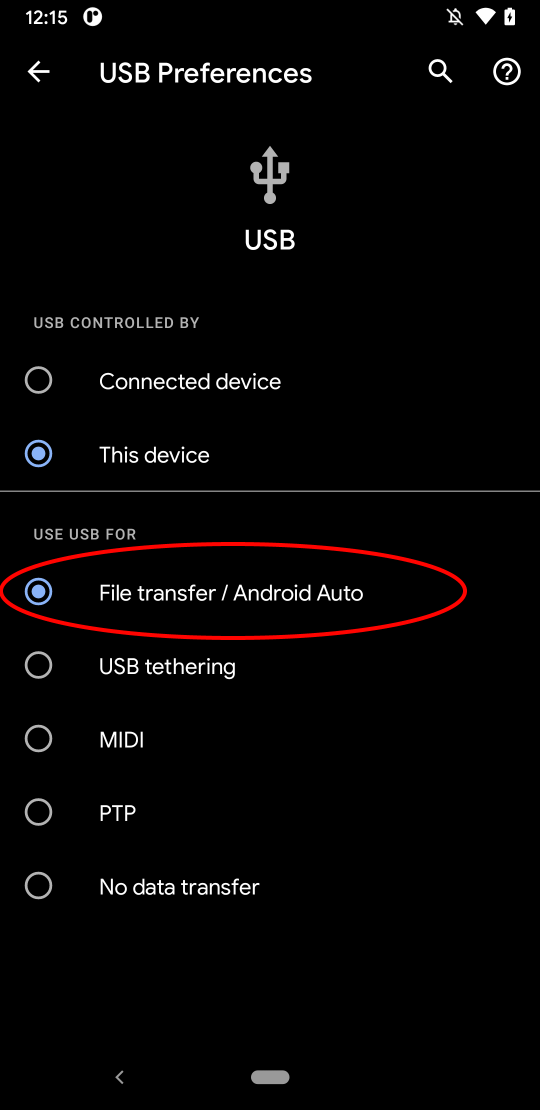
- Press "Tap for more options". This will take you to the USB Preferences screen, where you can enable file sharing.
- On your PC, you'll now be able to see your device's storage in the Explorer:
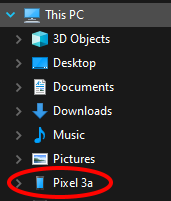
- Copy over the patched .iso file you created earlier to somewhere easy to remember - for example, create a folder called "PSP ISO" and copy the .iso file there.
- Start PPSSPP, navigate to your patched Soul Eater: Battle Resonance on the Games tab, then tap the game and enjoy!
You may also wish to connect a game controller to your Android device to improve your gameplay experience. You can configure your controller in PPSSPP by going to Settings > Controls > Control Mapping.
Guide and images courtesy of PPSSPP documentation contributors.
Emulate on iOS / iPadOS
Requirements:
- iOS / iPadOS Device (iPhone, iPad, iPod Touch)
- Mac or Windows computer
- PPSSPP
Playing the game:
- Download PPSSPP off the App Store.
- Connect your iOS device (iPhone or iPad) via USB to your PC.
- Open the device in Finder. Click the Files tab, then you should see PPSSPP and/or PPSSPP Gold listed.
- Drag the patched .iso you created earlier into the app.
- After this, the .iso files will be located on the virtual "memory stick". Just pick the the patched Soul Eater: Battle Resonance from the Games tab (click Home if you can't find the files), and enjoy!
You may also wish to connect a game controller to your iPhone to improve your gameplay experience. You can then configure your controller in PPSSPP by going to Settings > Controls > Control Mapping.

Setup guide
This guide will walk you through getting the patch up-and-running on your system or emulator of choice!